Let's start!
Materials:
Pliers (I would recommend 2 pliers but I only had one and had to improvise. I got some heavy duty tweezers to help me open up the jump rings)
Metal chain of any color
Optional:
Any charms of your choice (I decided not to use mine, but you get the general idea)
!!!Make sure to enlarge the photos for a better view and understanding!!!
Get some chains (I used a old necklace for this. Yay for recycling!) and put it around your middle finger and measure down an inch or inch and a half so that it looks like a raindrop.

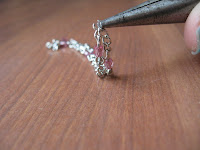
Open up one of the jump rings from one side of the chain and put the other side inside the open jump ring. To make the explanation easier, let's say the left chain hanging from the picture above is A and the right is B. Open A's jump ring and insert B's side into the open jump ring.
This is what it should basically look like after you've attached the two sides together.
Now measure around your wrist and make it loose, probably about 1-3 centimeters bigger.

Now this part is somewhat confusing to explain but I hope you get it. When you open up the jump ring for the wrist section and put the other side into the open jump ring, you will put the finger section (the raindrop one) into the open jump ring as well. Here's a drawing to help you:
The red circle is the finger section and the green "circle" is the wrist section. Take the open jump ring from the wrist section and put the finger section inside of that open jump ring. So your basically making an eight shape. The other picture above will help you as well. (The little "c" is the open jump ring)((Sorry the drawing is terrible, my tablet wasn't with me))
Now just close your jump ring and voila! Your slave bracelet is complete!
(If you were to put your charm, put it where the two sections interlock)
I just have a couple tips for you when your finished with this bracelet:
- It may be a little hard to put on or may be a little loose. If it's small, add some more chain onto the wrist section. If it's too big then take off some of the chain with your pliers.
- If it's confusing to put on, the smaller circle will be for your finger and the bigger circle will be for your wrist. I usually put the wrist section on half way and then put the finger section onto my finger and then slide down the wrist section.
If you have any questions, please don't hesitate to ask! I'll be more than happy to help you guys!
Have fun everyone

.JPG)


No comments:
Post a Comment